
How to Install Windows 10/11 Without a Microsoft Account
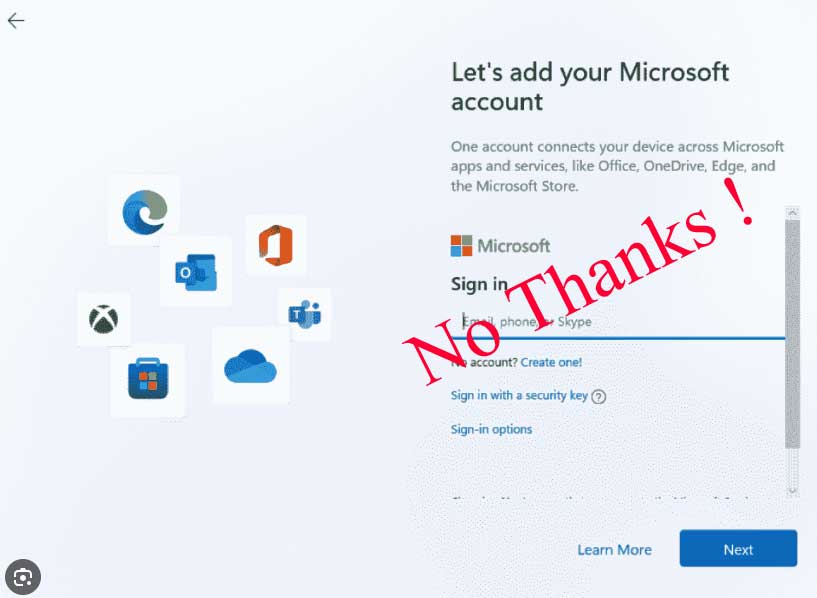
Starting with later versions of Windows 10 and Windows 11, you are forced to sign in with or create a new Microsoft account before you can install Windows. We find this very irritating and Microsoft does not give you an easy option to bypass it. If you want to install Windows without a Microsoft account, then create a Local Account instead.
Create a Local Account
A Local windows account means that you are not connecting to a domain, or a work environment. This is not to say that you cant later, but for the purposes of this article we will focus on creating a Local account. You may prefer not want to create a Microsoft account if you enjoy your privacy, this is a home computer, or a child’s computer.
Before You Begin
During a normal installation Microsoft uses your internet connection to automatically link you to sign in during install. One of the steps here is to disconnect your internet connection. If you have a hardwired connection, unplug your Ethernet cable when instructed during this process. If you are connected via wireless, look for the option “I dont have internet‘ in one of the steps.
Does it Work for Windows 10?
The basic procedure should work for Windows 10 as well although some of the screenshots will look different.

Start the Windows 11 Install
Put in your Windows 11 DVD to start the installation process. When you get to this screen, this is where you will disconnect the internet. If you are hardwired, disconnect your Ethernet cable now. If you ares connected wireless that step is coming up.

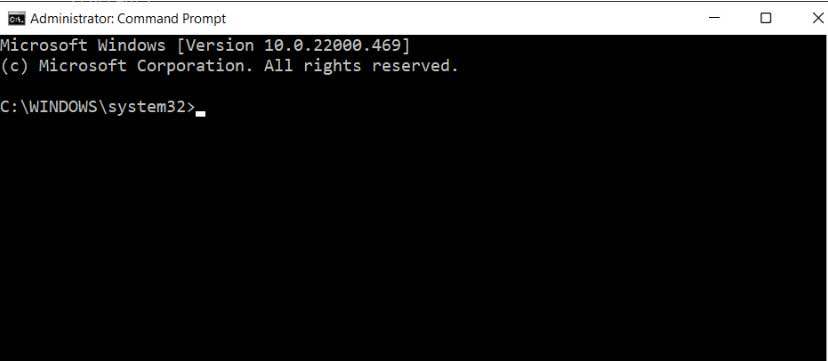
Before proceeding we have to run this at a command line. This prevents Windows 11 from forcing you have have internet to proceed. On your keyboard, hit Shift + F10 keys. That should bring up a command line prompt that looks something like this.
(NOTE: If nothing happens when you hit those keys, see Footnote 1 at the bottom of this page)
Next, click in this black box to place your cursor there then type this OOBE\BYPASSNRO. It is not case sensitive, and notice that is a BACKslash in between the words. This disables the internet connection requirement. So it will look like this:
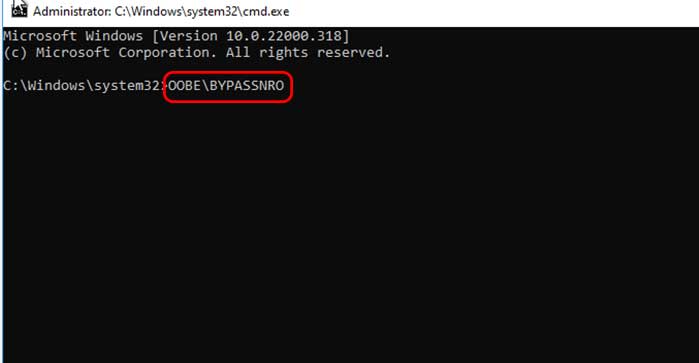
Then hit ENTER on your keyboard. It will return you to the System32 screen.
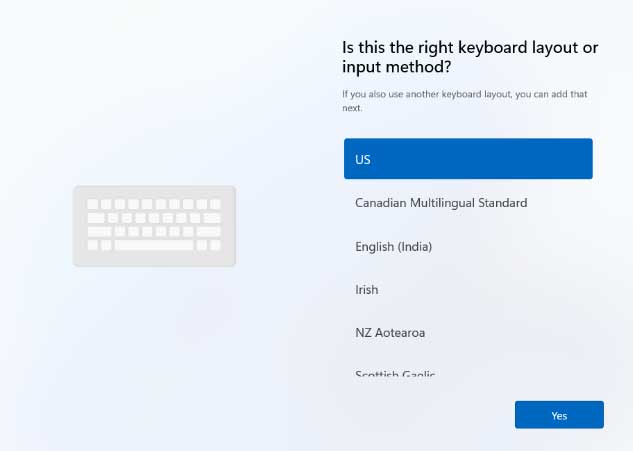
Hit Shift + F10 AGAIN and type IPCONFIG/RELEASE. Note this time it is a FORWARD slash between the words. This released your IP address to make sure you are not online.
Next, close the black command line window to proceed with the installation. You should be at the Choose Keyboard screen like this.
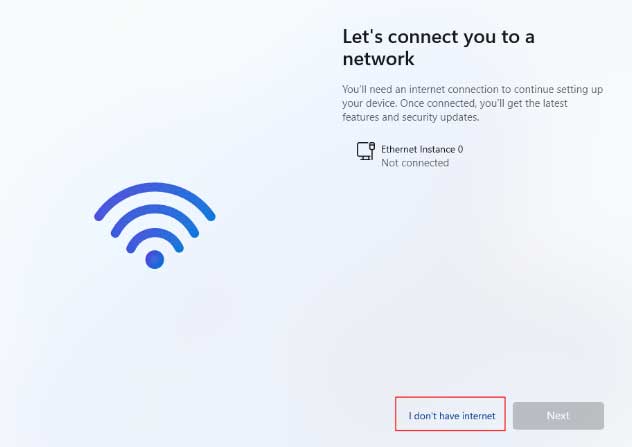
The next screen will warn you that you need to Connect to a network (internet). Here is where you will click on I Don’t Have Internet link at the bottom before proceeding.
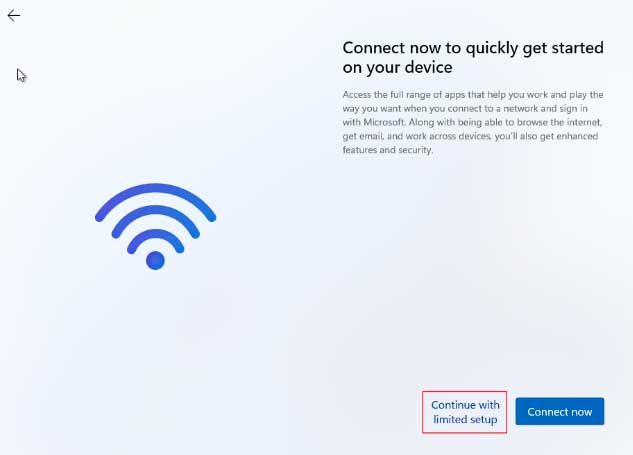
Followed by a similar window with a second warning shaming you that you don’t have internet. Click on Continue with Limited Setup link at the bottom to move forward.
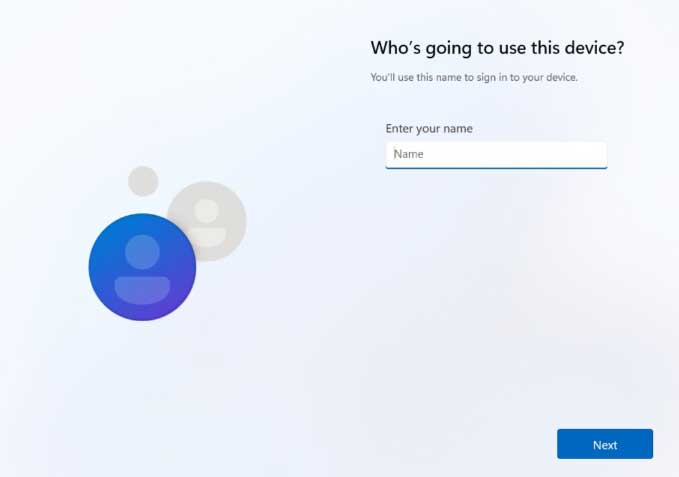
Now you are home free! The next screen will prompt you to create a username for your Local Account. Follow the prompts to create a username and password for your account.
Follow the prompts to complete the installation of Windows until you see a windows Desktop. At this point reconnect your Ethernet cable to connect back to the internet. If you are using wireless, setup your wireless connection to get online.
That’s it!
If Shift + F10 Does NOT Work
Footnote #1:
If nothing happens when you hit Shift + F10 as described in previous steps, you will have to connect to the internet before you can proceed with install then follow the alternate steps below. You will have no other choice, but don’t worry we will still show you how to make a LOCAL account vs having to sign into a Microsoft account. This only applies to the Professional version of Windows, not Home edition.
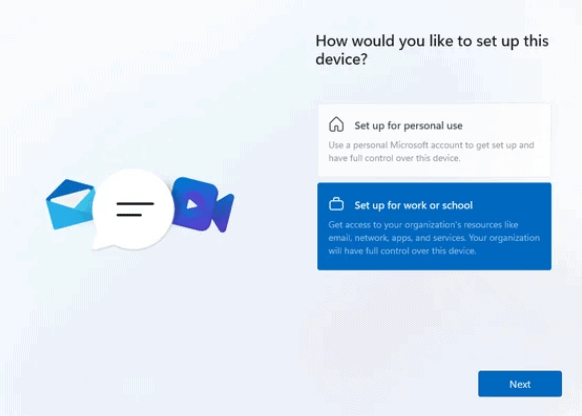
When you get to this screen, choose the Work or School option (NOT personal). Don’t worry this is only temporary, you are going to proceed ‘AS IF’ you will connect to a Domain, but not really.
Next, Microsoft will continue to ask you to sign in with a Microsoft account, DON’T do that.
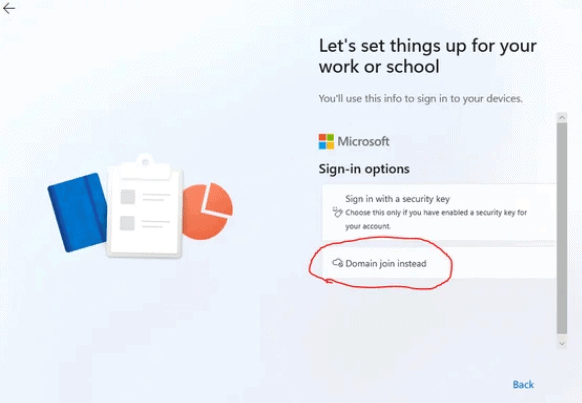
Click on the link that says Sign In Options. Then follow the prompts to Join Domain instead. You will see a page similar to this:
You should be able to proceed forward from here, creating a Username and Password for a Local Account. Complete the installation and when you are finished, you can confirm you are on a Workgroup (local account) and NOT on a Domain.
RIGHT Click on This PC from Start menu> LEFT Click on Properties > Advanced System Settings> Change to the Computer Name tab. You will see that you are on a Workgroup there. This is also the place where you can rename your PC if you like.
Need a New Computer?